Latest Updates
Showing posts with label windows. Show all posts

How to Optimize Windows 8


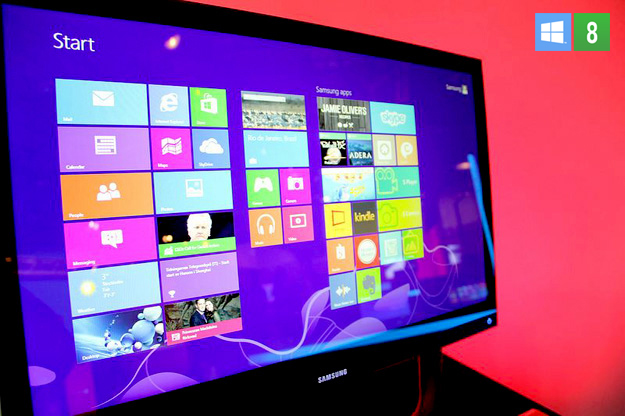
                                       windows 8 is finally here,if the you are used to previous versions  of windows then you are getting a notice on your screen.windows has seen the biggest changes since the jump from windows 3.1 to windows 95.
out goes the start menu ,in comes the new touch -oriented start screen ,new apps,new interface conventions -even experienced PC users may be left feeling a little lost.
                Don't despair,though,there is a help from "pentium pro".there are few tricks and tips to get easy with windows 8.try these few tips.


1.Lock  screen

        windows 8 opens on its lock screen, which looks pretty but unfortunately display no clues about what to do next.It's all very straightforward ,though.just tap the space bar,spin the mouse wheel or swipe upwards on a touch screen to reveal a regular login screen with the user name you created during installation.enter your password to begin.

2.Basic navigation

               windows 8 launches with its new interface,all colorful tiles and touch-friendly apps.And if you're using a tablet then it'll all be very straightforward:just swipe left or right to scroll the screen ,and tap any tile of interest.
             On a regular desktop ,though,you might alternatively spin the mouse wheel to scroll backwards and forwards. and you also use the keyboard.press the home or End keys to jump from one end of your start screen to the other,for instance,then use the cursor keys to select a particular tile,tapping Enter to select it.Press the Windows key to return to the start screen;right click (or swipe down on )apps you don't need and select unpin to remove them;and drag and drop the other tiles around to organise them as you like.

3.App groups

        The start screen apps are initially displayed in a fairly random order,but if you'd prefer a more organised life then it's easy to sort them into custom groups.
        you might drag people,mail,messaging and calender over to the left-hand side ,for instance ,to form a separate 'people'group.click the 'minus'icon in the bottom right corner of the screen to zoom out and you'll now find you can drag and drop the new group (or any of the others) around as a block.  
        Right -click within the block (while still zoomed out)and you'll also be able to give the group a name,which -if you go on to add another 20 or 30 apps to your start screen-will make it much essier to find the tools you need.

4.Quick access menu

                     Right -click in the bottom left corner (or hold down the windows key and press x)for a text -based menu that provides easy access to lots of useful applets and features:device manager ,control panel,explorer,the search dialog and more.

5.Find your applications

                           The Win+X menu is useful,but no substitute for the old start menu as it doesn't provide access to your applications.To find this ,hold down the windows key and press Q or either right-click an empty part of the start screen or swipe your finger up from the bottom of the screen and select'all apps' to reveal a scrolling list of all your installed applications.Browse the various tiles to find what you need and click the the relevant app to launch it.
                                       

6.Easy access 

             If there's an applications you use all the time then you don't have to access it via the search system.pin it to the start screen and it'll be available at a click.Start by typing part of the name of your application.To access control panel,for instance,type 'Control".Right -Click the 'Control Panel' tile on the Apps search screen,and click 'pin to start,.If you're using a touchscreen ,press and hold the icon ,then flick down and select 'Pin to Start".
            Now press the windows key ,scroll to the right and you'll see the control panel tile at the far end.drag and drop this over to the left somewhere if you'd like it more easily accessible,then click the tile to open the desktop along with the control panel window,and press the  Windows key to return you to the Start screen when you're done.

7.Shutting down

                                 To start windows 8 down,just move the mouse cursor to the bottom right corner of the screen,click the setting  icon -or just hold down the windows key and press I -and you'll see a power button .Click this and choose 'shut Down ' or 'Restart'.       
               Some of the tricks available in previous versions of windows still apply.Press Ctrl+Alt+Del ,for instance,click the power button in the bottom right-hand corner and you'll be presented with the same 'Shut Down 'and 'Restart ' options.And if you're on the desktop ,press Alt+F4 and you'll be able to choose 'Shut Down' , 'Restart','Sign Out' or 'Switch User" options.


common windows 8 error messages


 Following are some of the most common Windows 8 error messages, notifications, and just plain confusing attempts at conversation. Find a message that matches what you’re experiencing and then read how to handle the situation as gracefully as Windows 8 will allow.

Would you like to install this device software?


Meaning: Are you sure that this software is free from viruses, spyware, and other harmful things?
Probable cause: A window similar to the one shown appears when you try to install or update a driver for one of your computer’s parts.
Solutions: If you’re sure the file is safe, click the Install button. But if this message appears unexpectedly, or you think it may not be safe, click the Don’t Install button.

Do you want to save changes?


Meaning: You haven’t saved your work in a program, and your work is about to be lost.
Probable cause: You’re trying to close an application, sign out, or restart your computer before telling a program to save the work you’ve accomplished.
Solutions: Look in the window’s title bar for the program’s name. Then find that program on your desktop (or click its name on the taskbar to bring it to the forefront). Finally, save your work by choosing Save from the program’s File menu (or tab) or clicking the program’s Save icon. Don’t want to save the file? Then click Don’t Save to discard your work and move on.

How do you want to open this type of file?

Meaning: The dialog box appears when Windows doesn’t know which program created the file that you double-clicked.
Probable cause: Windows programs add hidden secret codes, known as file extensions, onto the ends of filenames. When you double-click a Notepad file, for example, Windows spots the file’s secret, hidden file extension and uses Notepad to open the file. But if Windows doesn’t recognize the file’s secret code letters, this error message appears.
Solutions: If you know what program created the mysterious file, choose it from the list of programs offered in the message. (Click More Options to see other programs, but those programs will rarely be able to open the file.)
If Windows doesn’t offer any valid suggestions, however, choose Look for an App in the Store. You may need to download or buy an app from Start screen’s Store app.

Malware detected: Windows Defender is taking action


  Meaning: When the built-in Windows 8 antivirus program, Windows Defender, finds a potentially dangerous file on your computer, it lets you know with this message. Windows Defender then removes the file so it can’t harm your computer or files.
This particular notification looks identical on both the desktop and the Start screen; it always appears in the screen’s top-right corner.
Probable cause: A dangerous file — malware — probably arrived through e-mail, a flash drive, a networked computer, or a website. Windows is removing the file so it can’t do any harm.
Solutions: You needn’t do anything. Windows Defender has already caught and removed the evildoer.

Add your Microsoft account


Meaning: You must sign in with a Microsoft account to perform several tasks in Windows 8. If you don’t have a Microsoft account, you’ll see this message. Microsoft accounts let you reap the most benefits from Windows 8.
Probable cause: You may have tried to use the Mail, People, Calendar or Messenger app, which all require a Microsoft account. You also need one to download an app from the Microsoft Store.
Solutions: Sign up for a free Microsoft account.

You don’t currently have permission to access this folder


Meaning: If you see the dialog box shown here, it means Windows won’t let you peek inside the folder you’re trying to open. (The folder’s name appears in the message’s title bar.) A similar message appears when Windows won’t let you peek inside a file.
Probable cause: The file or folder belongs to somebody with a different user account.
Solutions: If you hold an Administrator account, you can open files and folders from other people’s user accounts by clicking Continue. If you don’t have an Administrator account, however, you’re locked out.
If an account holder wants to let others see inside the file or folder, he or she should copy or move the item into the Public folder.

Read More here

Windows 8 prices going up on February 1st

Windows 8 prices going up on February 1st

We are seeing good momentum with Windows 8 today. When upgrading from Windows 7, Windows 8 has a lot to offer including a beautiful new Start screen with live tiles, plus the familiar desktop and faster startup and longer battery life. Today I’d like to share the pricing details for the Windows 8 upgrade editions that will begin in February. I’d also remind you to take advantage of the great upgrade offer which lasts until January 31st 2013.

Windows 8 upgrade editions will be priced as follows starting in February:


  • The Windows 8 Pro upgrade edition will be available online and at retail for $199.99 MSRP (U.S.).
  • The Windows 8 upgrade edition will be available online and at retail for $119.99 MSRP (U.S.).
  • The Windows 8 Pro Pack will cost $99.99 MSRP (U.S.).
  •  The Windows 8 Media Center Pack will cost $9.99 MSRP (U.S.).

                  But we have our promotional offer available until January 31st 2013, you can upgrade to Windows 8 Pro for just $39.99 ERP* (U.S.) via Windows.com using the Windows 8 Upgrade Assistant or pick up a DVD copy at a local retailer for just $69.99 ERP* (U.S.). If you bought an eligible Windows 7 PC between June 2nd and January 31st, 2013 – be sure to register for the Windows Upgrade Offer and upgrade to Windows 8 Pro for only $14.99 ERP*** (U.S.). If you upgrade to the Windows 8 edition or buy a PC with the Windows 8 edition pre-installed and want to move to the Windows 8 Pro edition– you can purchase the Windows 8 Pro Pack (previously known as Windows Anytime Upgrade) directly within Windows 8 by going to the Start screen and typing “Add Features to Windows 8” and at participating retailers for $69.99 MSRP (U.S.) until January 31st. If are running Windows 8 Pro and want Windows Media Center and DVD playback, you can add the Windows 8 Media Center Pack for free until January 31st**.

If you are building your own PC from scratch, looking to run Windows 8 in a Virtual Machine (VM), or looking to run Windows 8 on a second hard drive partition – you will want to purchase the Windows 8 edition or Windows 8 Pro edition OEM product known as “System Builder”. You can find these products online at local retailers.

source blogging windows

How To Install Windows 8 From a USB Device

How To Install Windows 8 From a USB Device

The need to install Windows 8 from a USB device, like a flash drive, is a common one due to the fact that many computers, especially tablets and smaller laptops and desktops, no longer have optical drives.

In other words, that Windows 8 install disc doesn't do you much good if you don't have anywhere to put the DVD! If you want to install Windows 8 from a USB device, you'll need to get those setup files onto a USB device. Unfortunately, simply copying them there won't do.
Windows 8 is also sold as a downloadable ISO file which, if you choose to buy Windows 8 that way, requires some steps to get it properly copied to a flash drive as well.

Regardless of whether you have a Windows 8 DVD you need to get on a flash drive, or a Windows 8 ISO file with the same goal, the following tutorial will help you get the Windows 8 installation files properly copied to a flash drive so you can get on with the installation process.

Note: The following procedure applies equally to Windows 8 (standard) or Windows 8 Pro.

Difficulty: Average


Time Required: Getting the Windows 8 installation files onto a flash drive or other external USB device will take between 20 and 30 minutes, depending on what format your copy of Windows 8 is in right now and how fast your computer is.

Requirements:

A flash drive (4 GB or more) [Check Prices]
A Windows 8 DVD or Windows 8 ISO file
Access to a working computer, with a DVD drive if you have a Windows 8 DVD, with Windows 8, Windows 7, Windows Vista, or Windows XP installed
Important: If you have a Windows 8 ISO file and want that on a flash drive, start with Step 2. If you have a Windows 8 DVD and need that on the flash drive, start with Step 1.

Here's How:

Create an ISO file from the Windows 8 DVD. This is the procedure by which you create a single file, called an ISO image, that contains all the data stored on the Windows 8 setup DVD disc.

Once you have an ISO image created from your Windows 8 disc, come back here and continue on with this tutorial which will explain how to get that ISO file onto a flash drive.

Note: If you already know how to create ISO files with your favorite program, often called "ripping," then do so in whatever way you're used to doing it. However, if you've never created an ISO image, or don't have a program installed right now that does it, please see the linked tutorial above for complete instructions on doing so with a free program.

Download the Windows 7 USB/DVD Download Tool from Microsoft and then install it.

This free program from Microsoft properly formats your flash drive and then copies the contents of the Windows 8 installation ISO file you have to that flash drive.

Note: Don't worry that this program has Windows 7 in the title. This program works perfectly well with Windows 8 ISO files and can be installed in Windows 8, Windows 7, Windows Vista, or Windows XP.

Start the Windows 7 USB DVD Download Tool program. You should be able to find the shortcut on the Desktop, as well as in your Start menu or on your Start screen, depending on which version of Windows you installed the program on.

Click Browse on the Step 1 of 4: Choose ISO file screen.

Locate, and then select, your Windows 8 ISO file. Then click or touch Open.

Note: If you downloaded Windows 8 from Microsoft, check your Downloads folder or your Desktop for the ISO image. If you created an ISO image from your Windows 8 DVD, the ISO file will be wherever you created it to.

Click or touch Next.

Choose USB device on the Step 2 of 4: Choose media type screen.

Note: As you can see here, there is also a DVD option. While it doesn't do us much good in this case, since the end game is to get Windows 8's setup files on a flash drive, you could also use this tool to burn a Windows 8 ISO image to a DVD or BD disc.

On the Step 3 of 4: Insert USB device screen, choose from the drop-down box the flash drive or USB-connected external hard drive you want to put the Windows 8 setup files onto and then touch or click Begin copying.

Tip: If you haven't yet plugged in the USB storage device you're planning on using, you can do that now and then touch or click the blue refresh button to make it show up in the list.

Click or touch Erase USB Device if you're prompted to do so on a Not Enough Free Space window. If you don't see this, don't worry, it just means that your flash drive or external hard disk is already empty.

Important: If this message didn't make it apparent, you should know that whatever data you might have on this drive is going to be erased as part of the process of getting the Windows 8 setup files copied.

On Step 4 of 4: Creating bootable USB device, just wait for the Windows 7 USB DVD Download Tool to prepare the drive and copy the Windows 8 installation files to it.

The first Status you see will be Formatting, which will take anywhere from a few to several seconds, depending on how large the USB drive is that you're using. Next will be Copying files which could take anywhere from 15 to 30 minutes, possibly longer, depending on which Windows 8 ISO file you're working from, as well as on how fast your flash drive, USB connection, and computer is.

Tip: Don't worry if the percentage indicator jumps ahead quickly but then sits on a single number for a very long time. While it might not make a lot of sense to behave that way, it doesn't necessarily mean anything is wrong.

Assuming everything went as planned, the next screen should say Bootable USB device created successfully with a Status that says Backup completed.

You can now close the Windows 7 USB DVD Download Tool program window. The flash drive, or other external USB drive you're using, now has the necessary files on it to install Windows 8 and is also properly configured to be booted from.

Boot from the USB device that you just created to start the Windows 8 install process.

Tip: If the Windows 8 setup process doesn't start, it's very likely that you'll need to make boot order changes in the BIOS. See How To Change the Boot Order in BIOS if you need help doing that.

Note: If you came here from my How To Clean Install Windows 8 tutorial, you can return there now to continue the walkthrough of that process.


                       Discover What Really Works Online, As You Go Behind The Scenes With Two Of The Worlds Top Marketers!learn step by step and earn real money from internet .
click here

  Start Your Own Home-based Affiliate Marketing Business With Super Affiliate Rosalind Gardner's Expert Guidance! Topics Include Blogging, Market Research, Affiliate Programs, Web Design, Problem Avoidance And So Much More! Updated Regularly.
click here


view original article